Torpedo Instructions (version 1.4.4)

The launch direction of the torpedo is set by the -/+ adjustment. You need to carefully select your firing angle as the units involved in the different scenarios were not able to re-load at sea.

The spread is needed when you launch a Torpedo salvo, it will increment the direction of the torpedo one by one.

Example:

You set the target at 260 and the spread is 3 degrees.

The torpedoes will progress every turn at their speed and along courses. When they run out of energy, they simply sink. You can track the torpedoes on the map screen.

Gunnery Instructions (version 1.4.4)

The gunnery interface has been enhanced in the version 1.4.4. You will select a gun mount on the unit view. When a gun mount is effectively selected his background will be white.

The name and information of the selected gun mount will appear in the gun mount view (bottom right corner of the screen). Fire Mode button allows to select the order for the gun mount:

Hold Fire No fire

Fire Once Fire one time per turn (minute) or at the rate of fire if it is less than one shot per minute

All Gun Blazing Fire at maximum rate

Straddle This fire mode allows to converge faster on the target, you can see the dispersion of a straddle fire in the red box inside the map view.

Gunnery_04

You can select the ammunition type. APM stands for Armor Penetration munition and HEM stands for High Explosive Munition. APM are efficient against heavy armored plated hulls and HEM are efficient against superstructures.

Gunnery_03

Map, Speed, Heading and Steering (version 1.4.4)

The map in the upper left corner of the screen is centered on the unit.

It is zoomable and there is a scale on the left side. The boat previous course is the black line and the white mustache is seized according to the speed.

map
Each bar is 1 nm (nautic mile). There is a compass providing directions and north alignment. The longitude (Lng) and latitude (Lat) are provided in the degree / decimal format.

Heading

The Heading cursor is below the Port / Starboard boxes. As you are displacing the cursor you will see the Heading order updated. The Heading order will be the unit direction at the next turn. Heading actual is the current heading.

Power
The second cursor allows you to control the power. The speed up or down will be delayed due to the inertia of the boat. Boat speed are in nautical knots (kn), one knot of speed is one nautical mile per hour. Based on the power setting the Fuel level will decrease over time.
Evasive steering is controlled by a switch. When on, the boat will have a zigzag course. This was done to throw off the enemy gunnery and was quite efficient above a certain speed (~15 kn).

Boat and Crew Status (version 1.4.4)

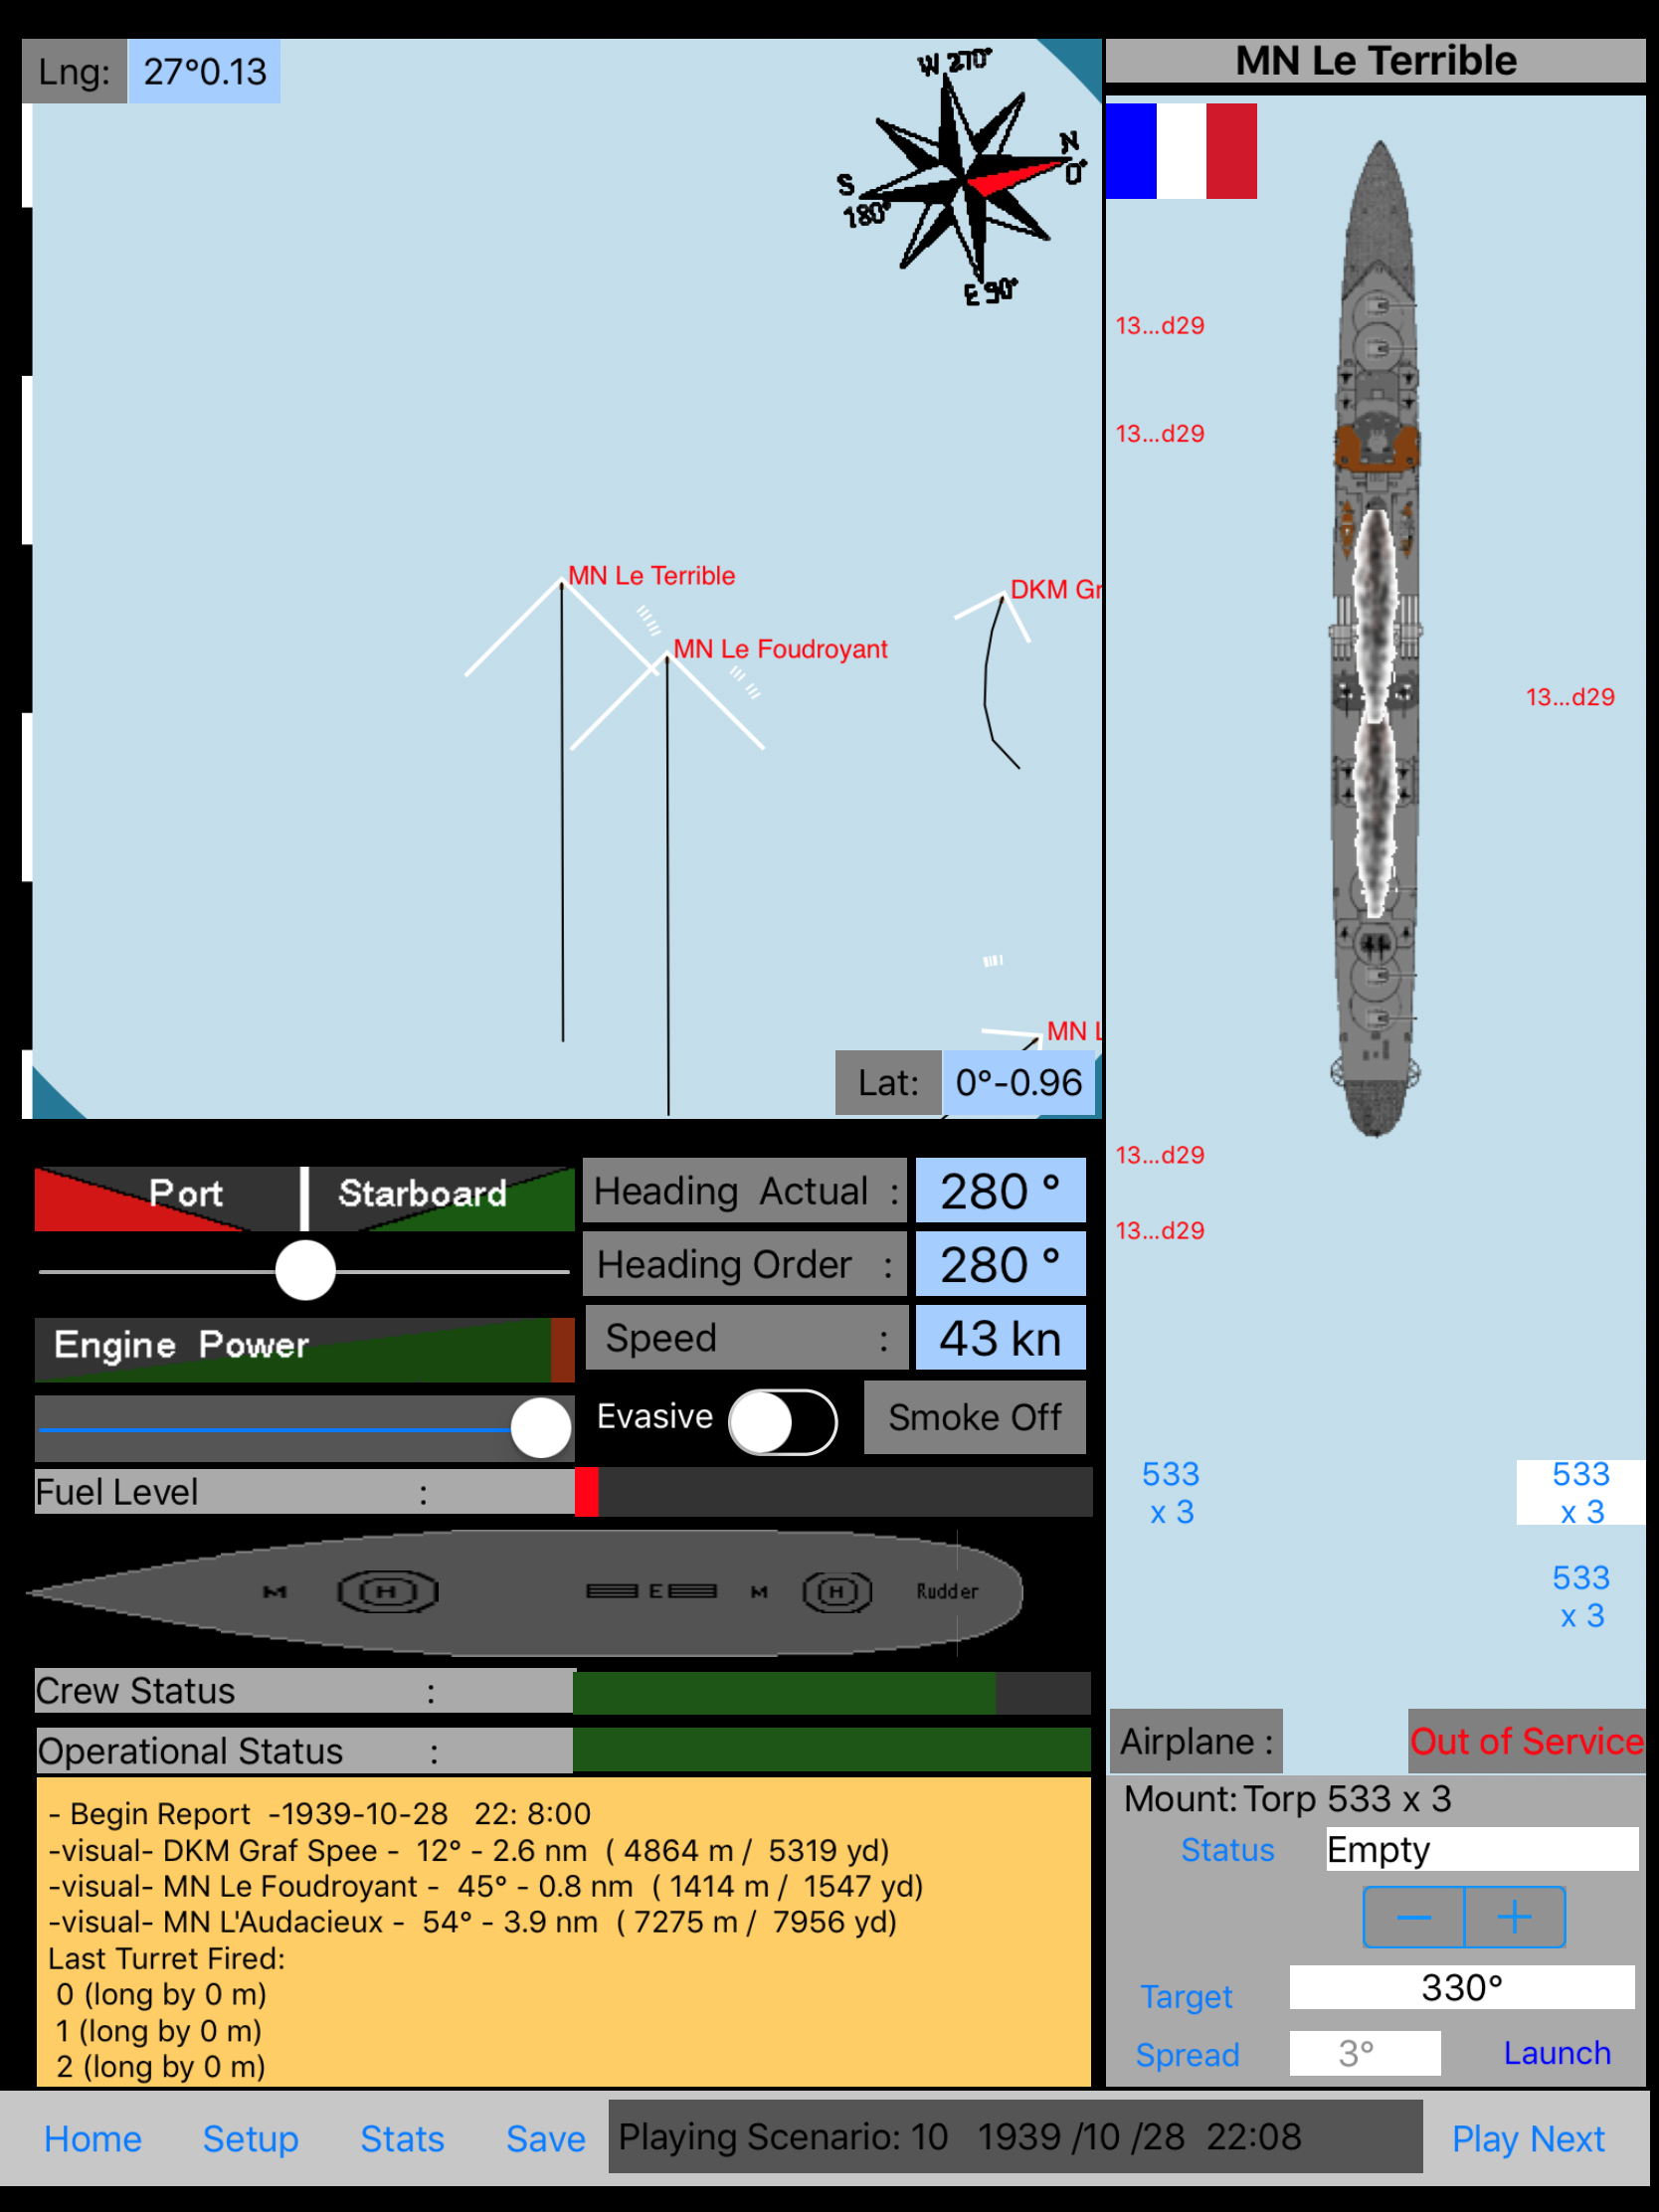
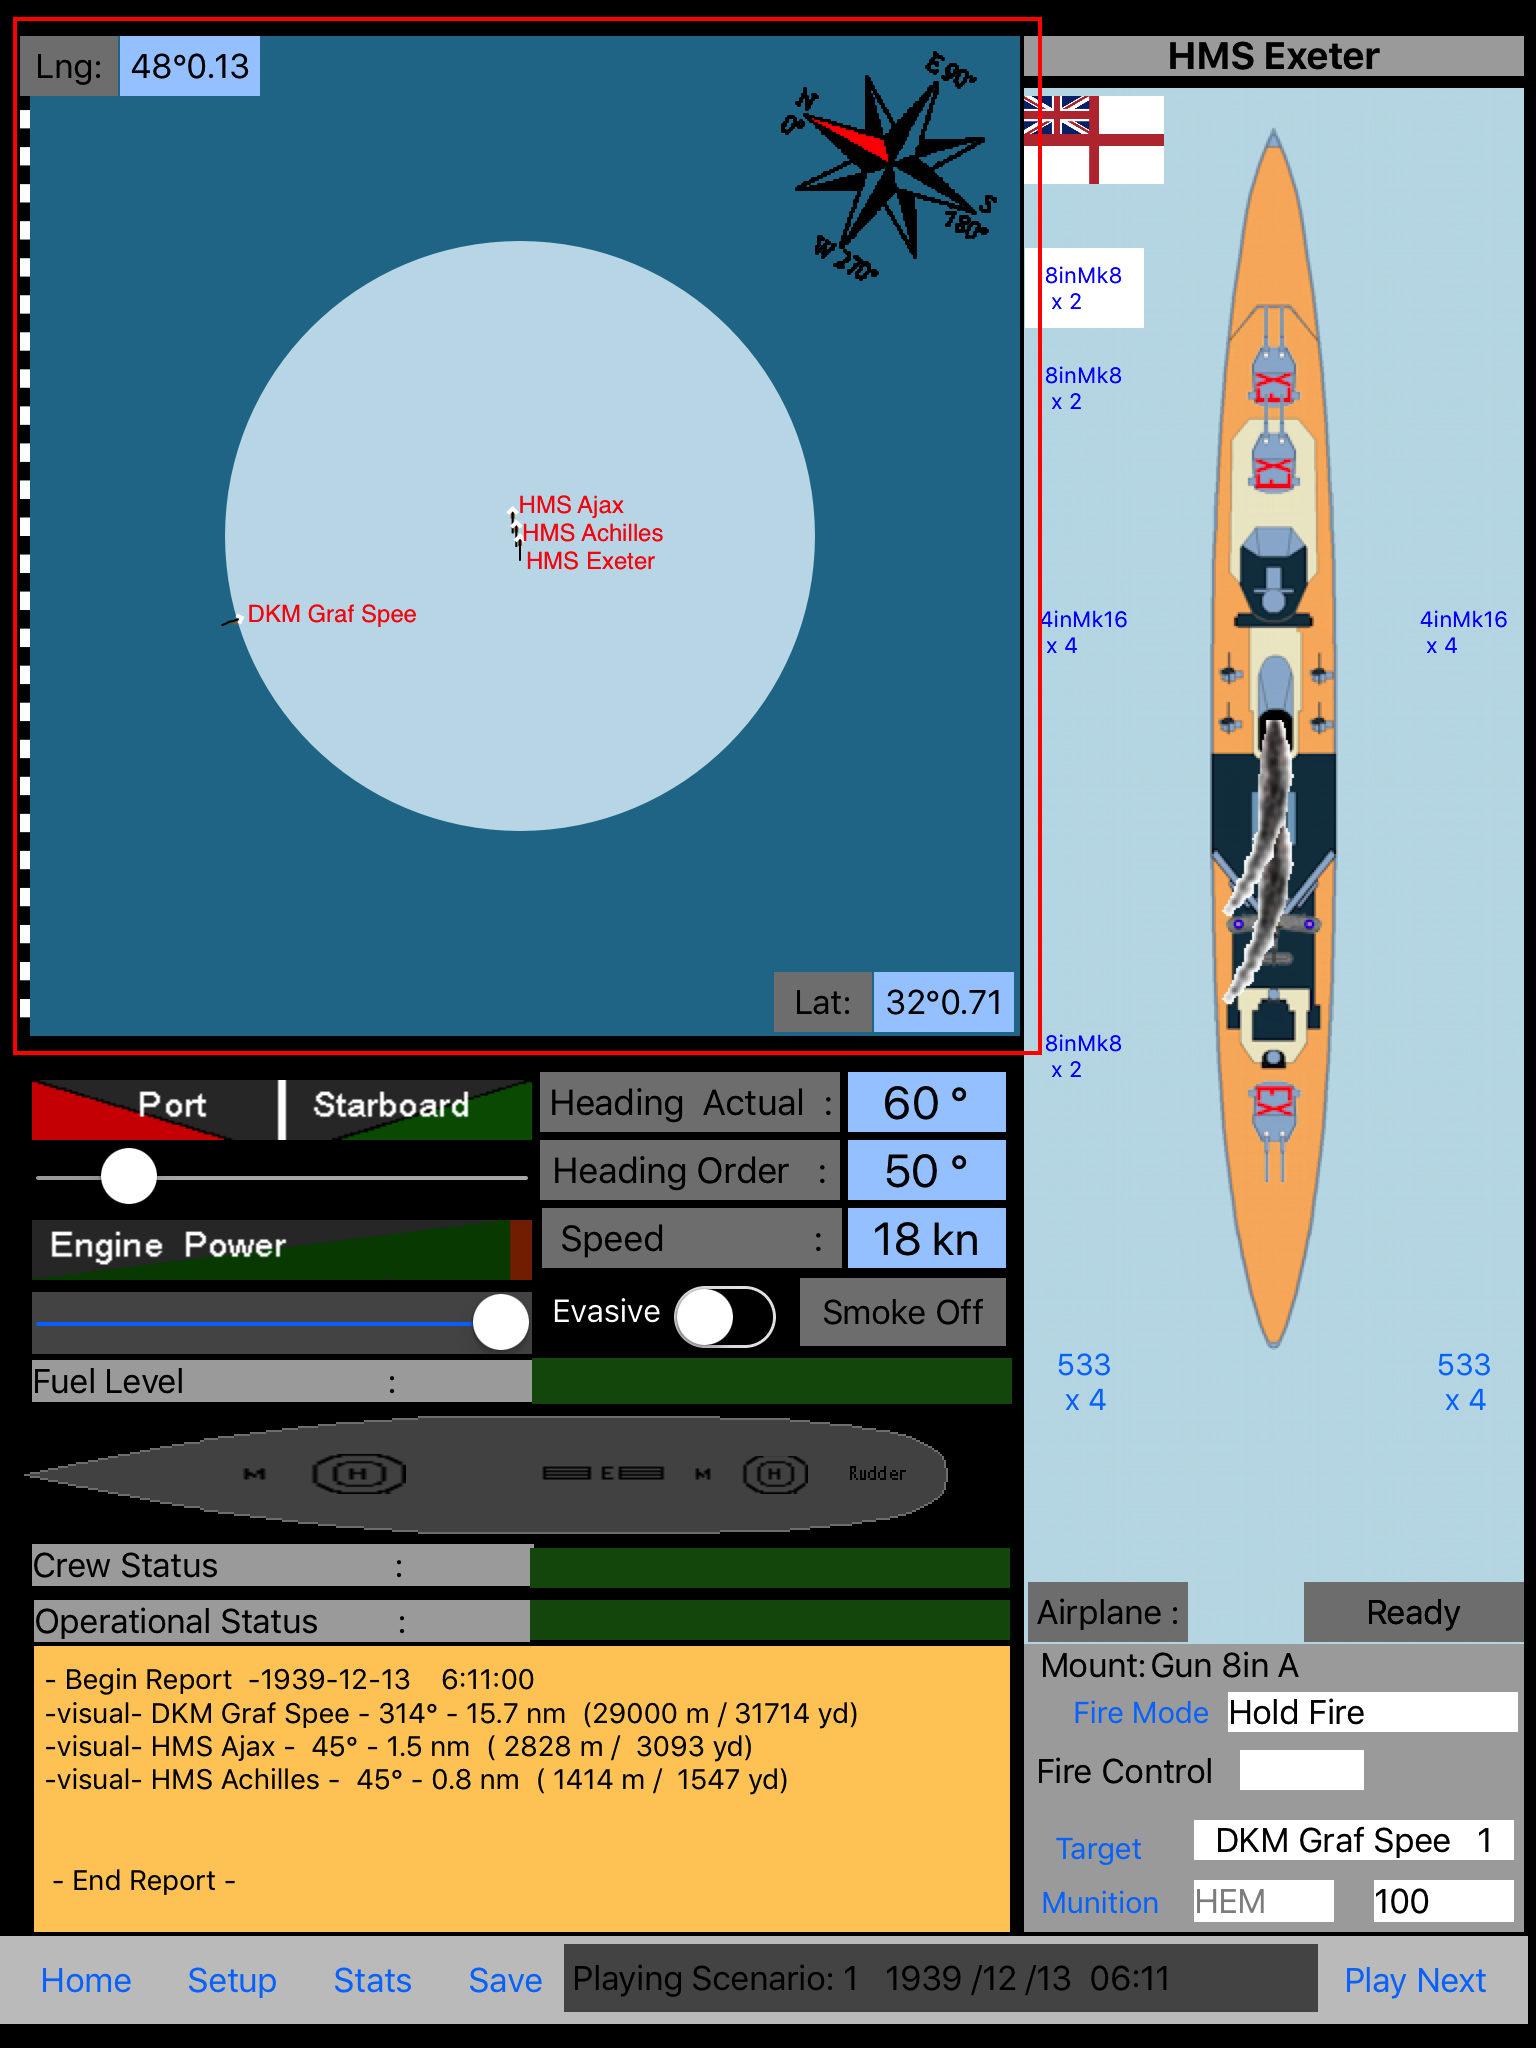
The Operational Status summarize the overall combat worthiness of the boat. It is a combination of the power plant effectiveness, the accumulated damages to the structures (including the gunnery). Successive damages, by gun hit, torpedoes or bomb, will diminish the Operational Status down. The status bar will go from green to orange and ultimately red. Be careful to manage your units to keep them afloat, when the Operational Status is down to 0 your boat is a worthless sinking wreck!

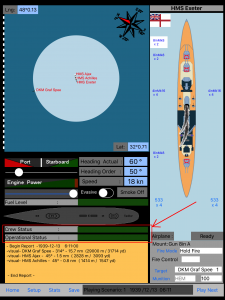
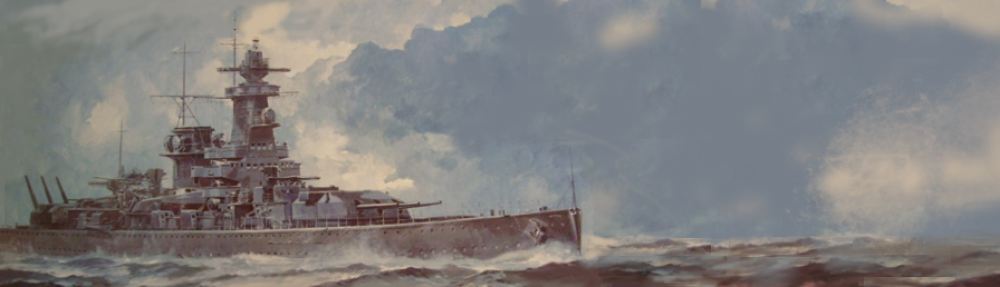
The Crew Status is a combination of the accumulated stress and fatigue. The Moral, Training and Experience of the crew will influence the wearing out of the Crew Status through the engagement. Hits and near misses will be the main contributors to the degradation of the Crew Status. A lower Crew Status will affect the overall efficiency of the crew (Gunnery, Repair Operation and launch / retrieve of observation planes).

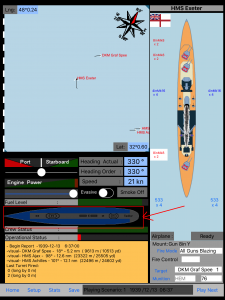
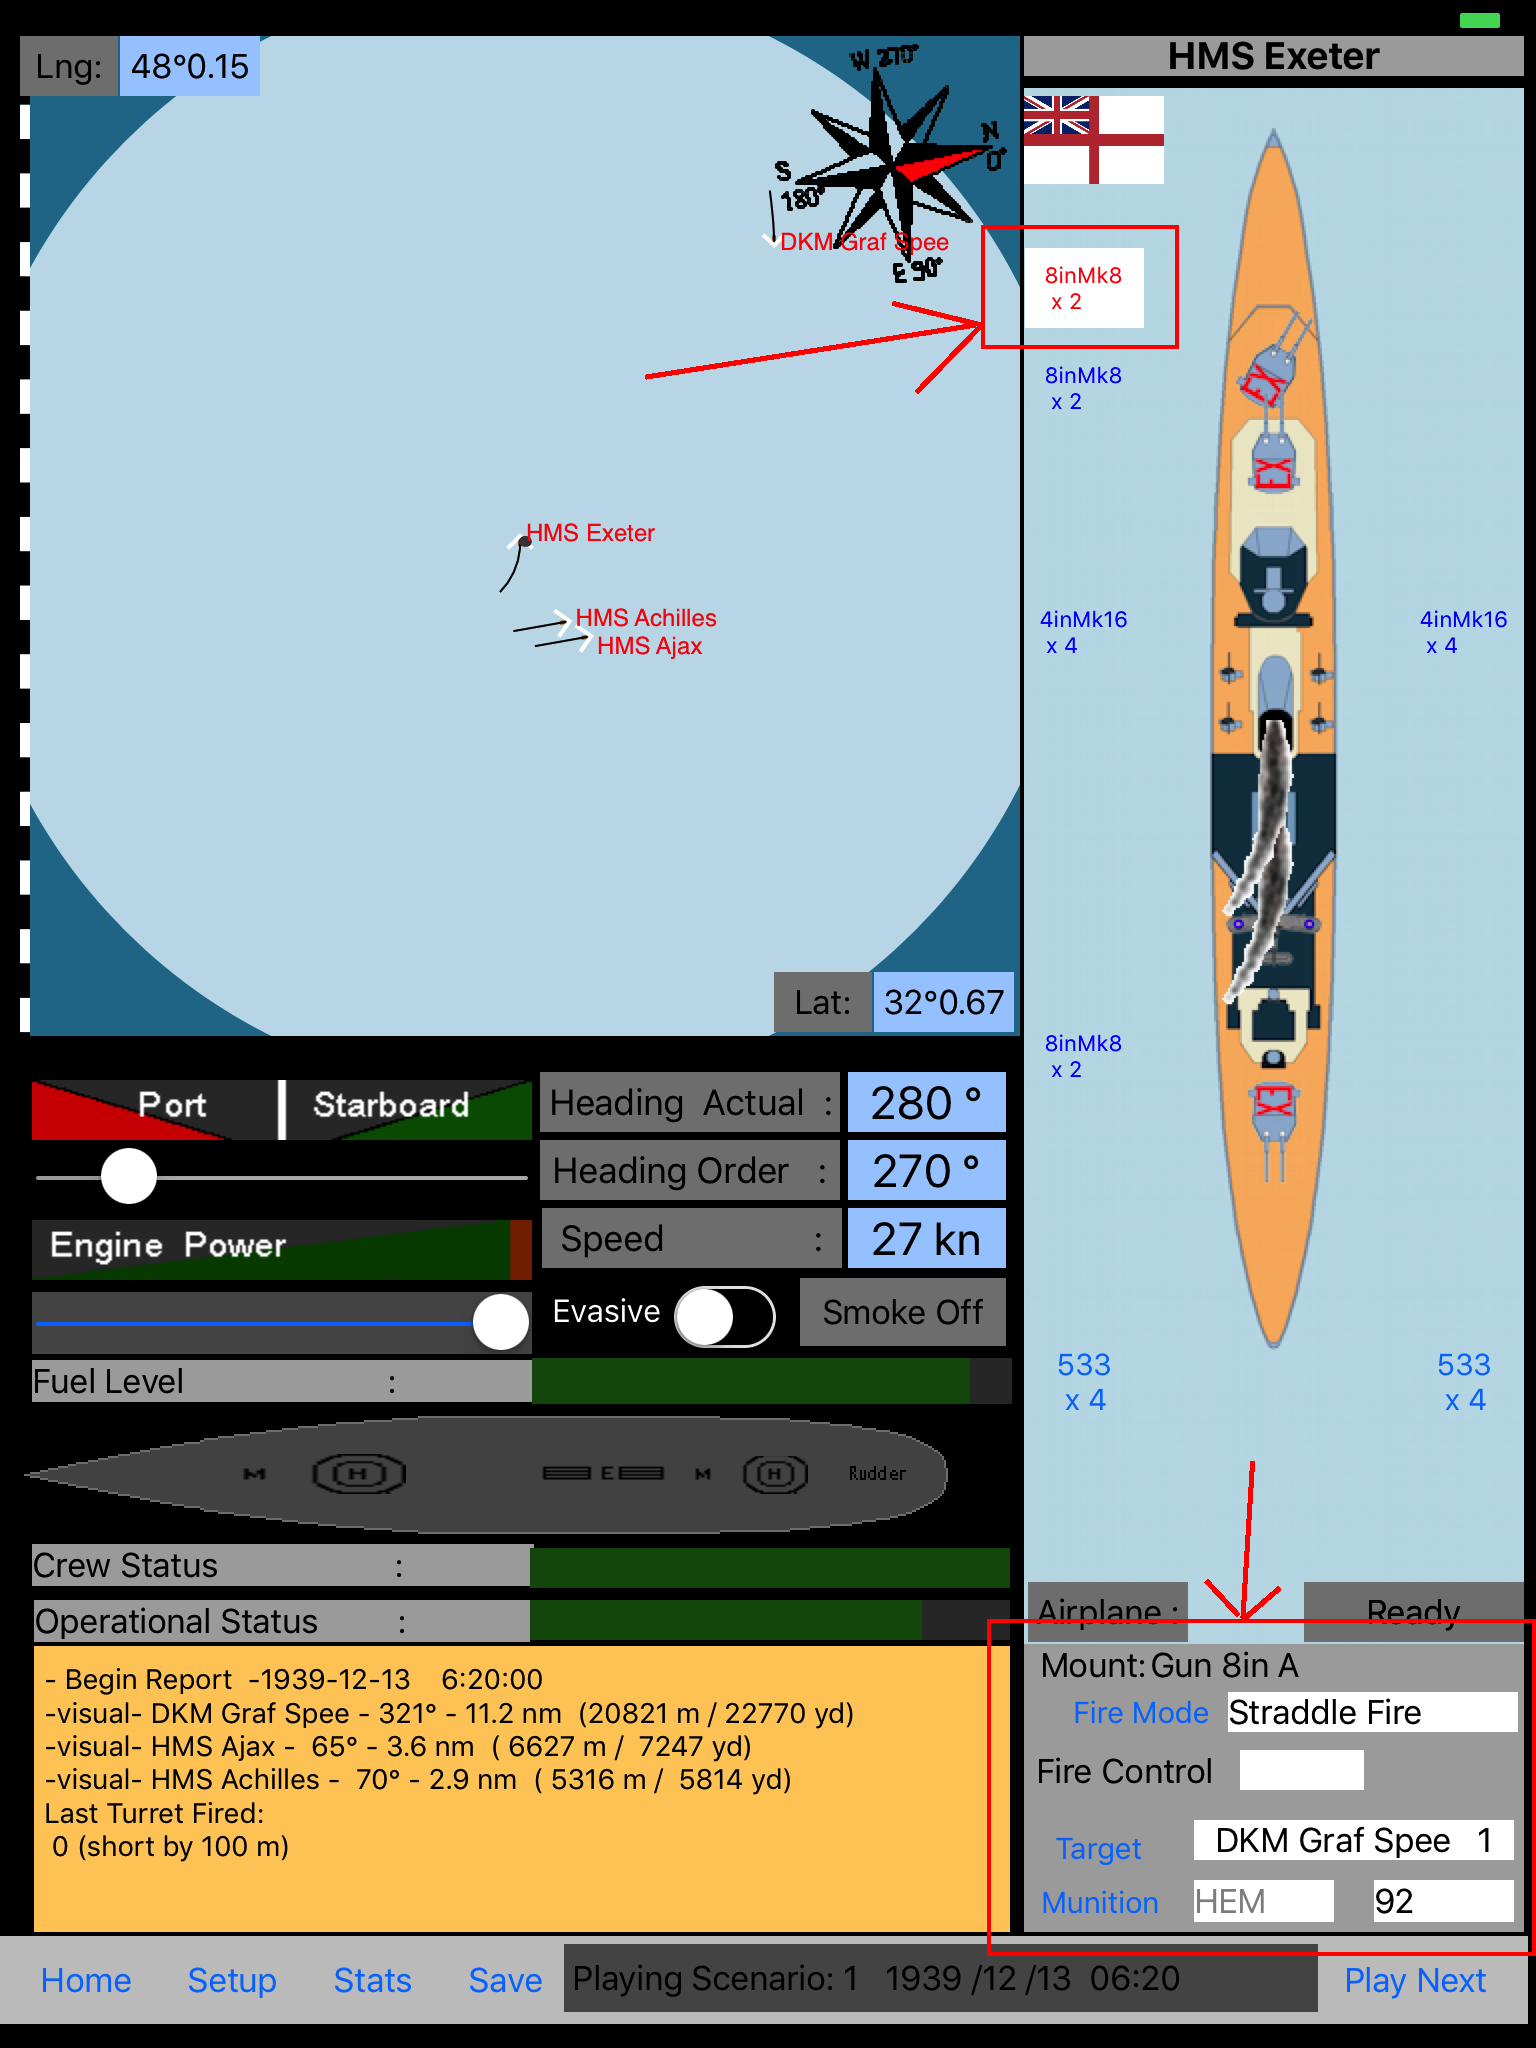
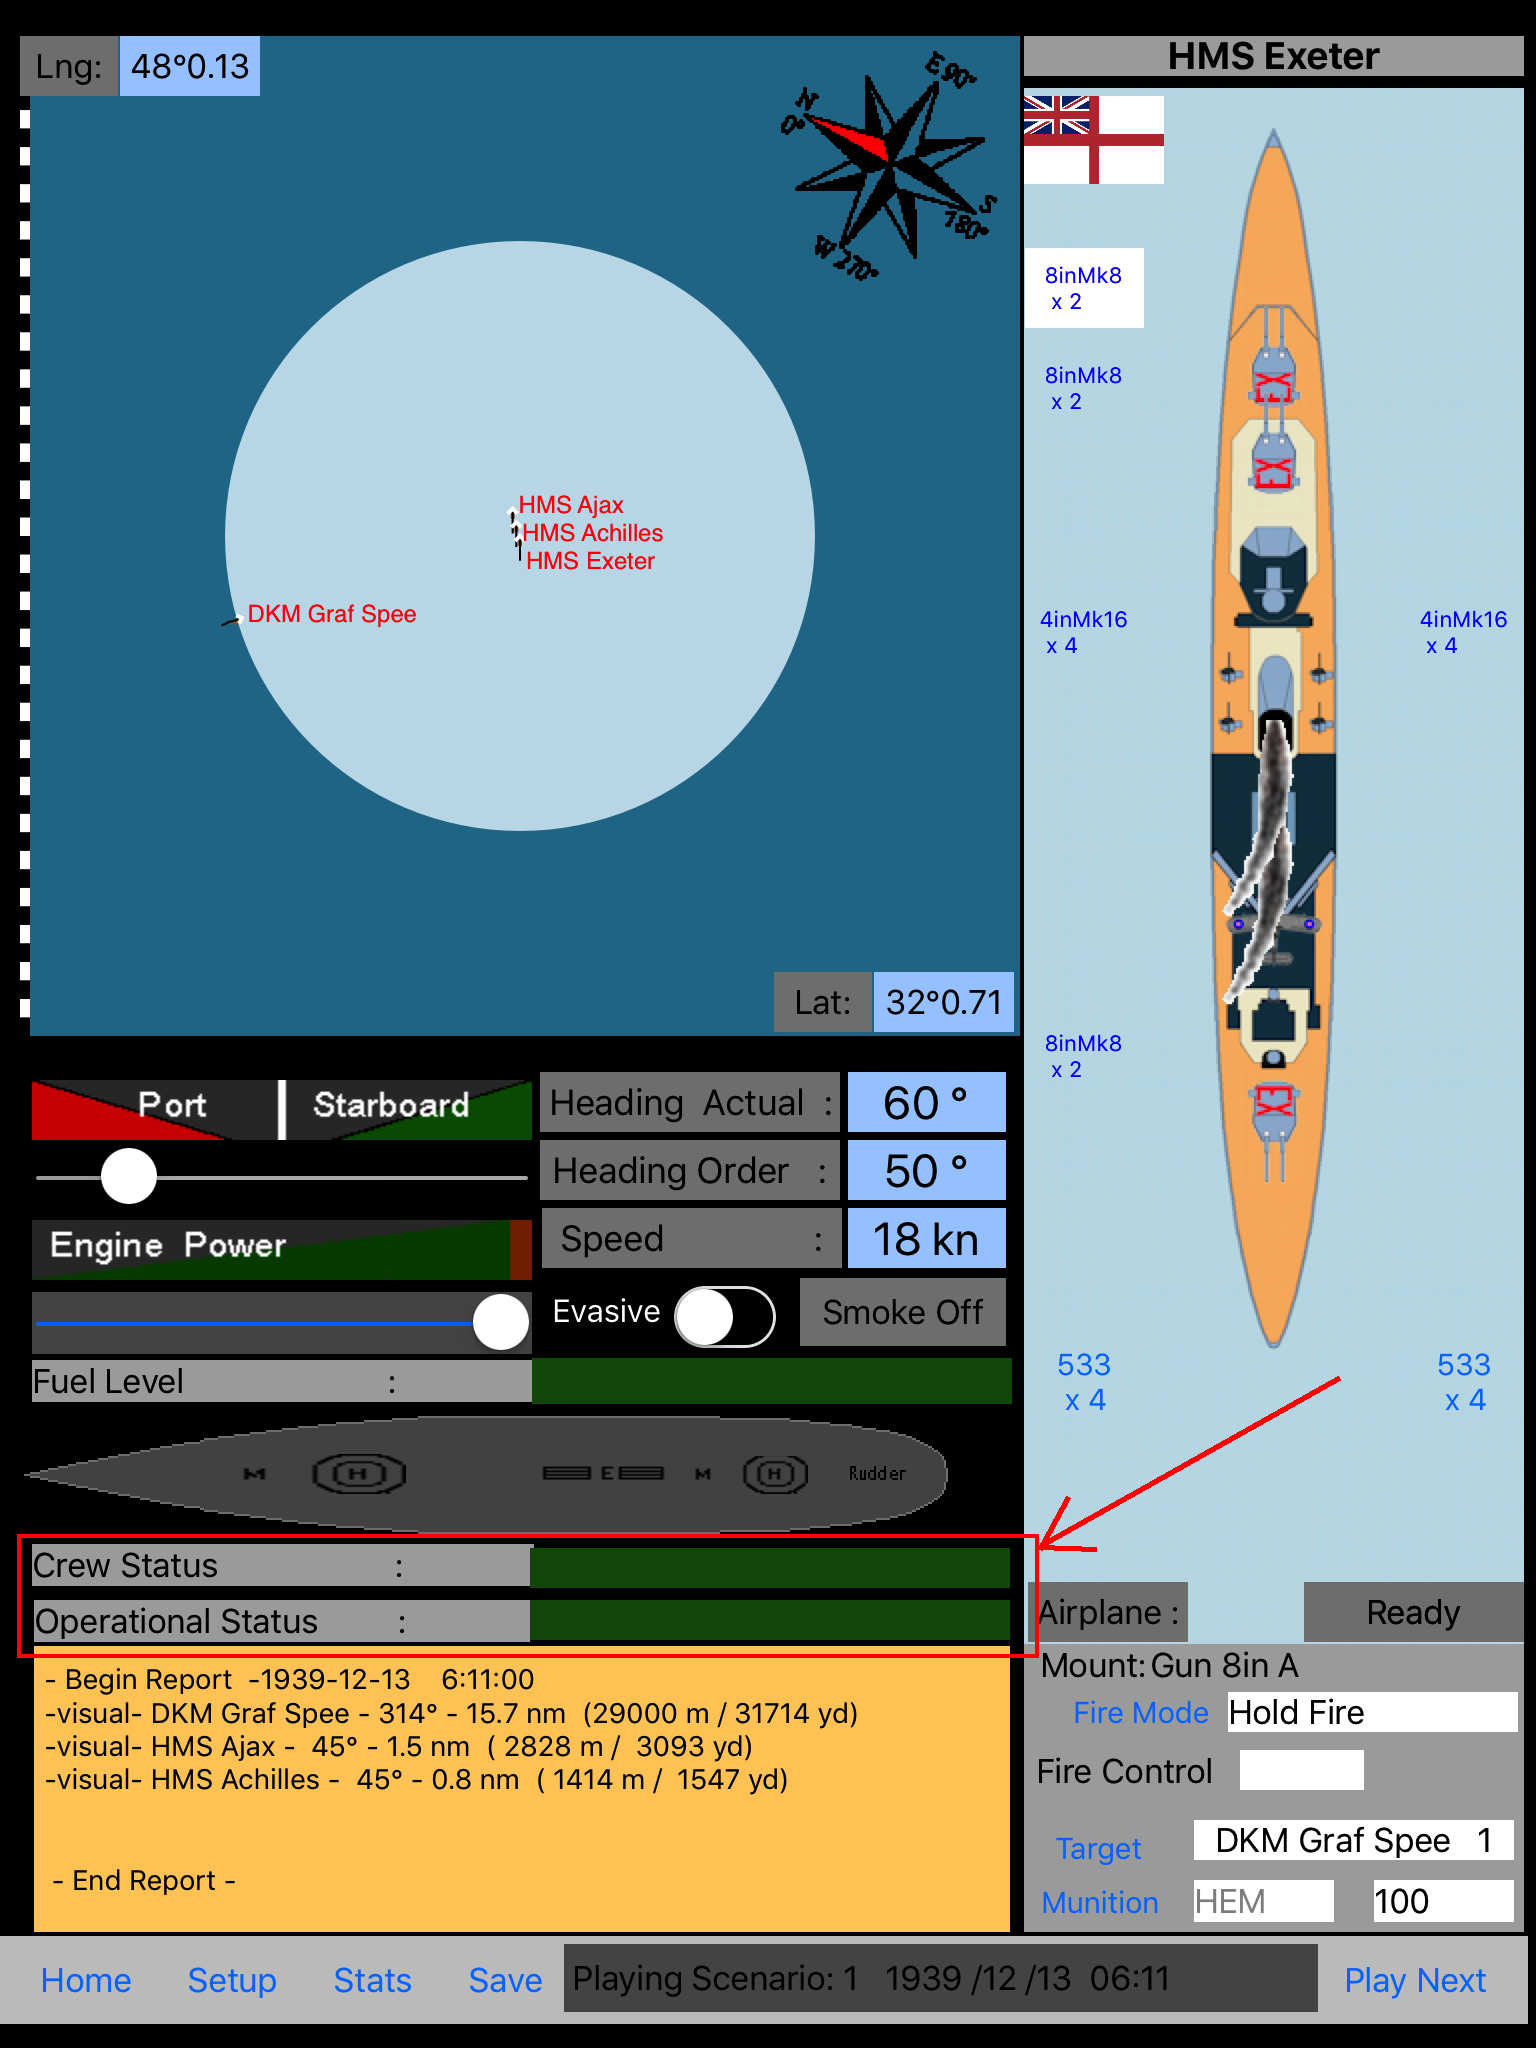
The boat flooding is represented on a schematic overview. Penetrating impacts on the belt or underwater will flood the hull, this flooding is limited due to the division in watertight compartments.