Aerial ranging assistance in early WW2: The Battle of the River Plate

After WWI cruisers and battleship started carrying planes. Quickly the standard became a catapulted seaplane. The recovery was tricky and seaplane maintenance was heavy due open sea operations.

They were used for long range observation and patrolling as the radar was in his infancy with a limited range. Some Navies also developed the procedures to enable those floatplanes to assist with ranging for long distance gun firing. 

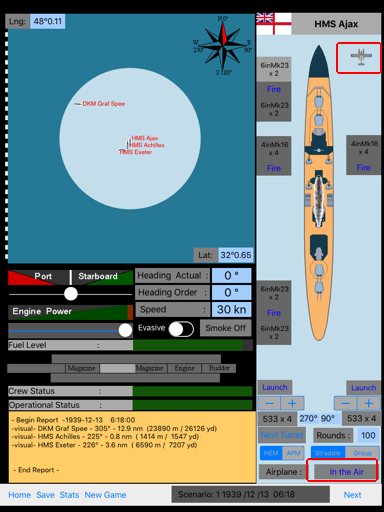
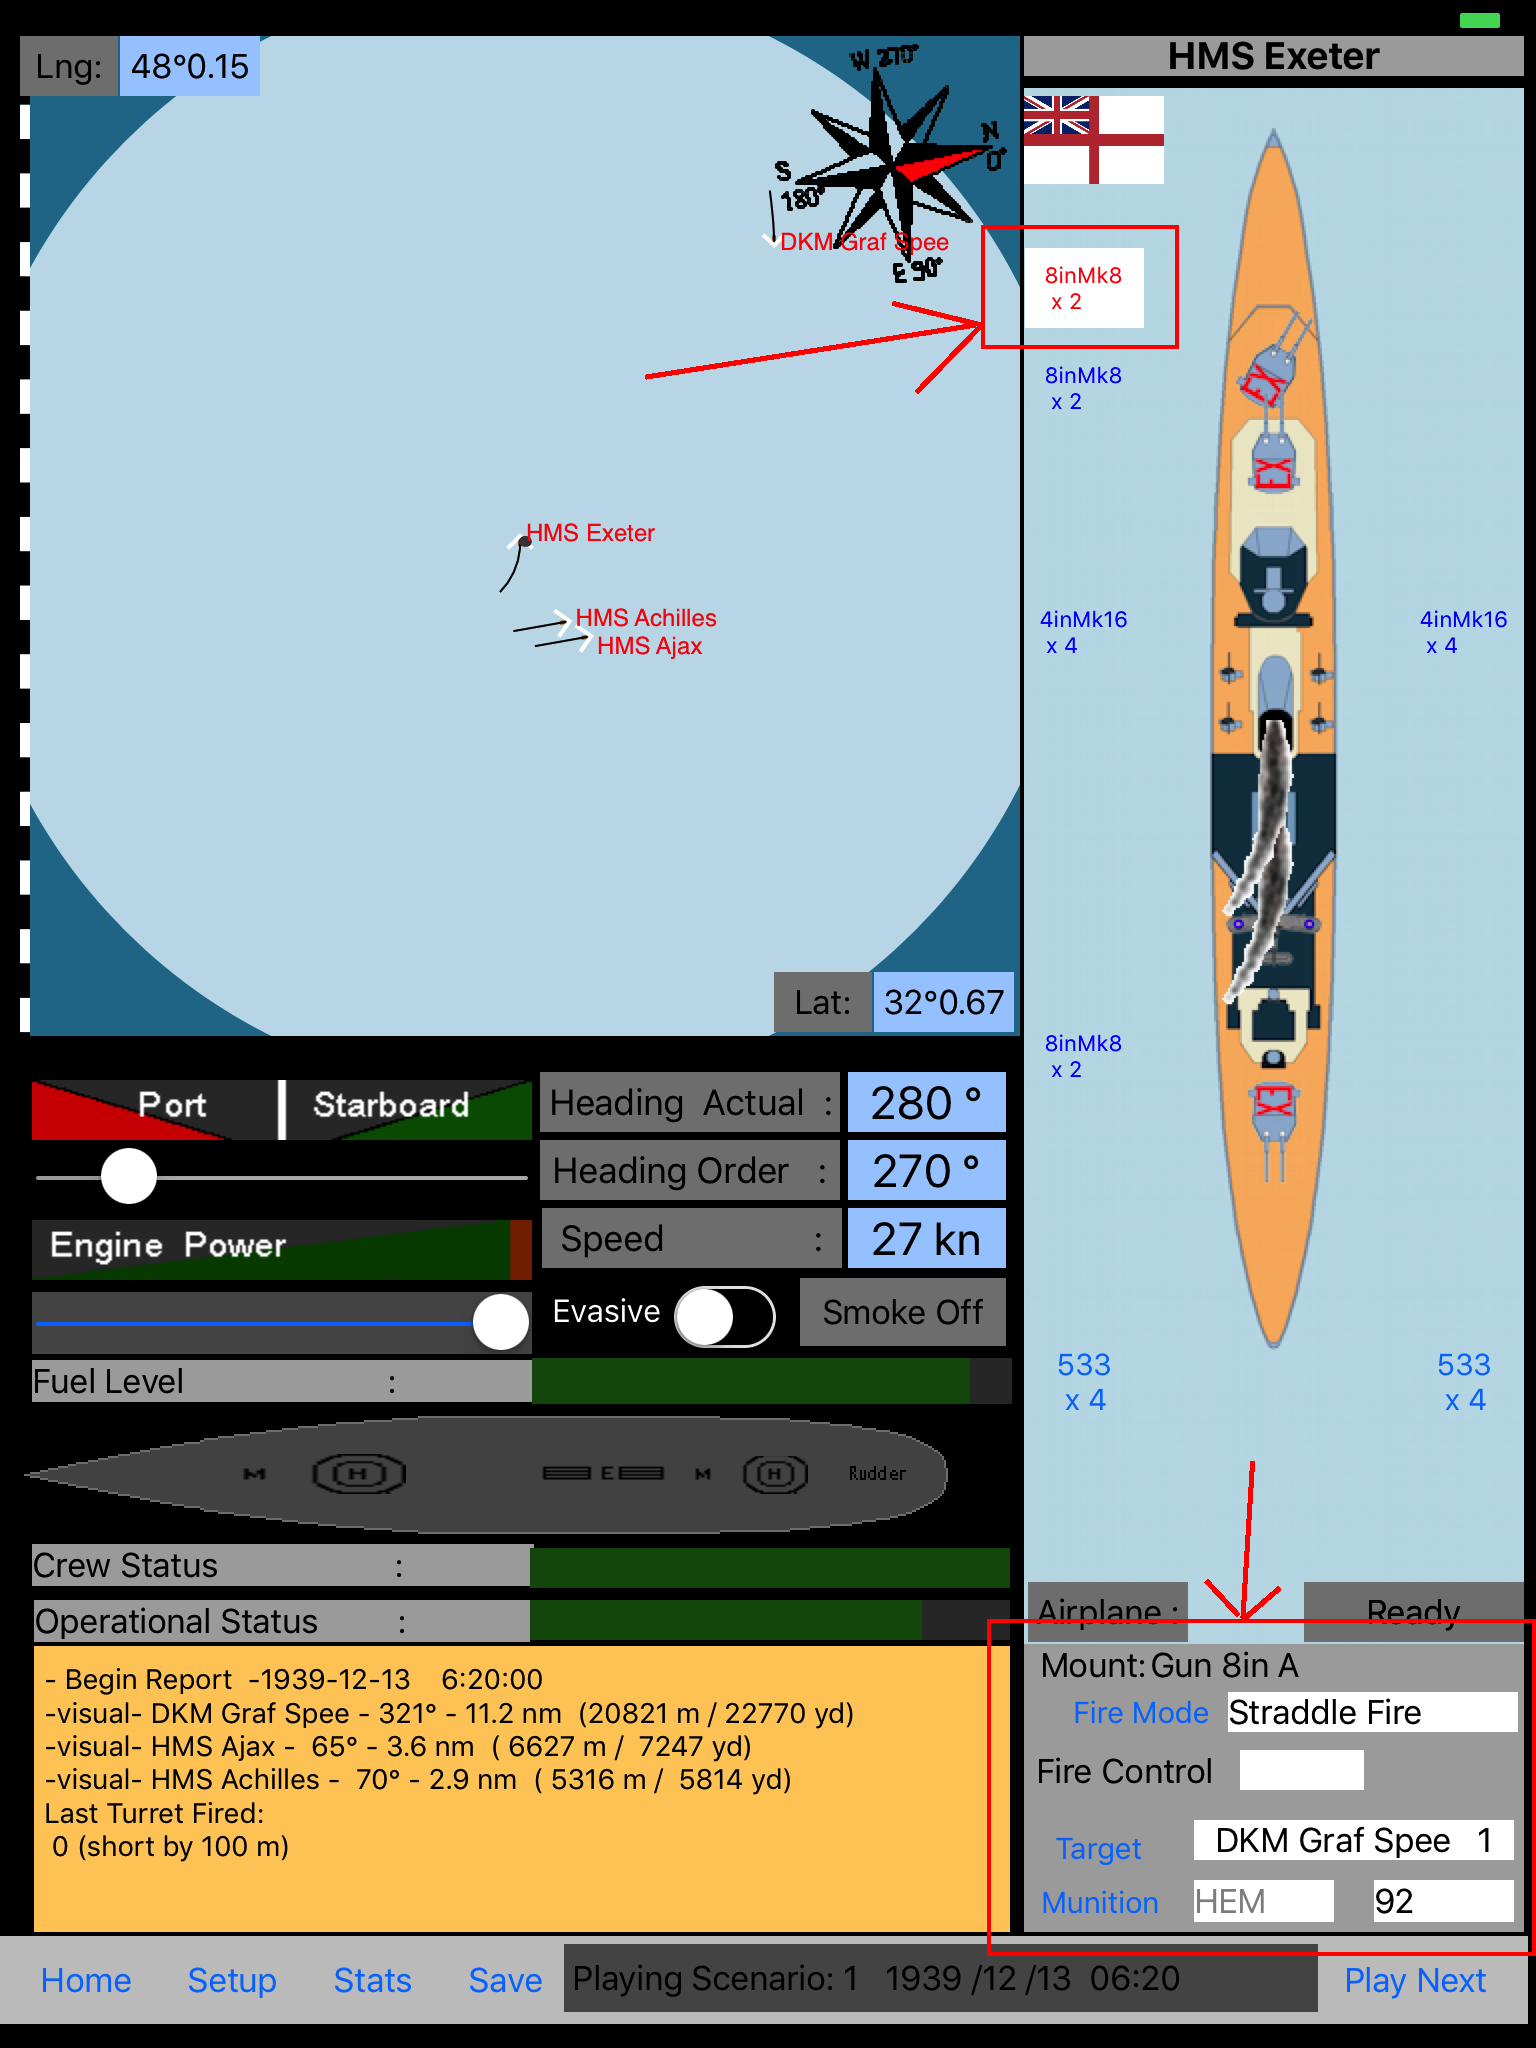
The only usable air asset to the British Squadron based in the Falklands was the Fairey Seafox from HMS Ajax. The other Seafox was damaged. This explain the caution from the British side to commit and catapult the seaplane [1]p.63.  Fortunately Lt Lewin pilot and Lt Kearney observer the airplane crew were extensively trained thru several missions looking out for U-Boats along the coast of Brazil.

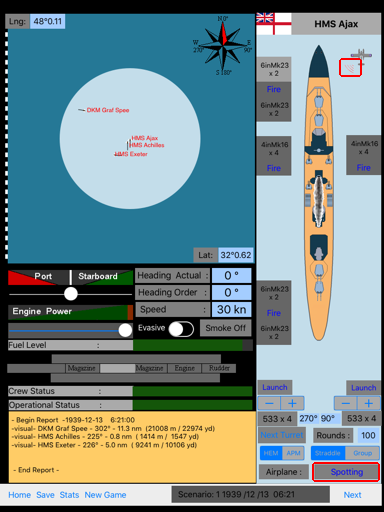
It is interesting to notice that communication to the float plane was using a different frequency depending of the type of mission. For the Royal Navy the wireless frequency for reconnaissance missions  was 230 kcs (KHz) and for spotting it was 3800 kcs (KHz). The longer wavelength (230 KHz) was enabling an extended range for transmission [2]p.128. Tuning in from one frequency to another was a complex process and unfortunately the information that the scouting Seafox was still on the 230 KHz channel was not passed to HMS Ajax communication team. The seaplane was catapulted around 6:40 and the frequency mismatch delayed the feedback from the scouting plane to 6:49am [2] p.150 and [1] p.76. There was further confusion between HMS Achilles and HMS Ajax burst which caused erroneous data to be fed back to the Dreyer tables of the HMS Ajax (mechanical firing computer). The full efficiency of the aerial scouting will start after 7:07am and last until 7:16 when the DKM Graf Spee broke the engagement with the 2 cruisers. During those 10 minutes most of the 20 6’ hits happened. Based on a firing cadence of 3 broadsides per minute it yield a success rate of ~5% at a range about 16 Kyards (15 km).

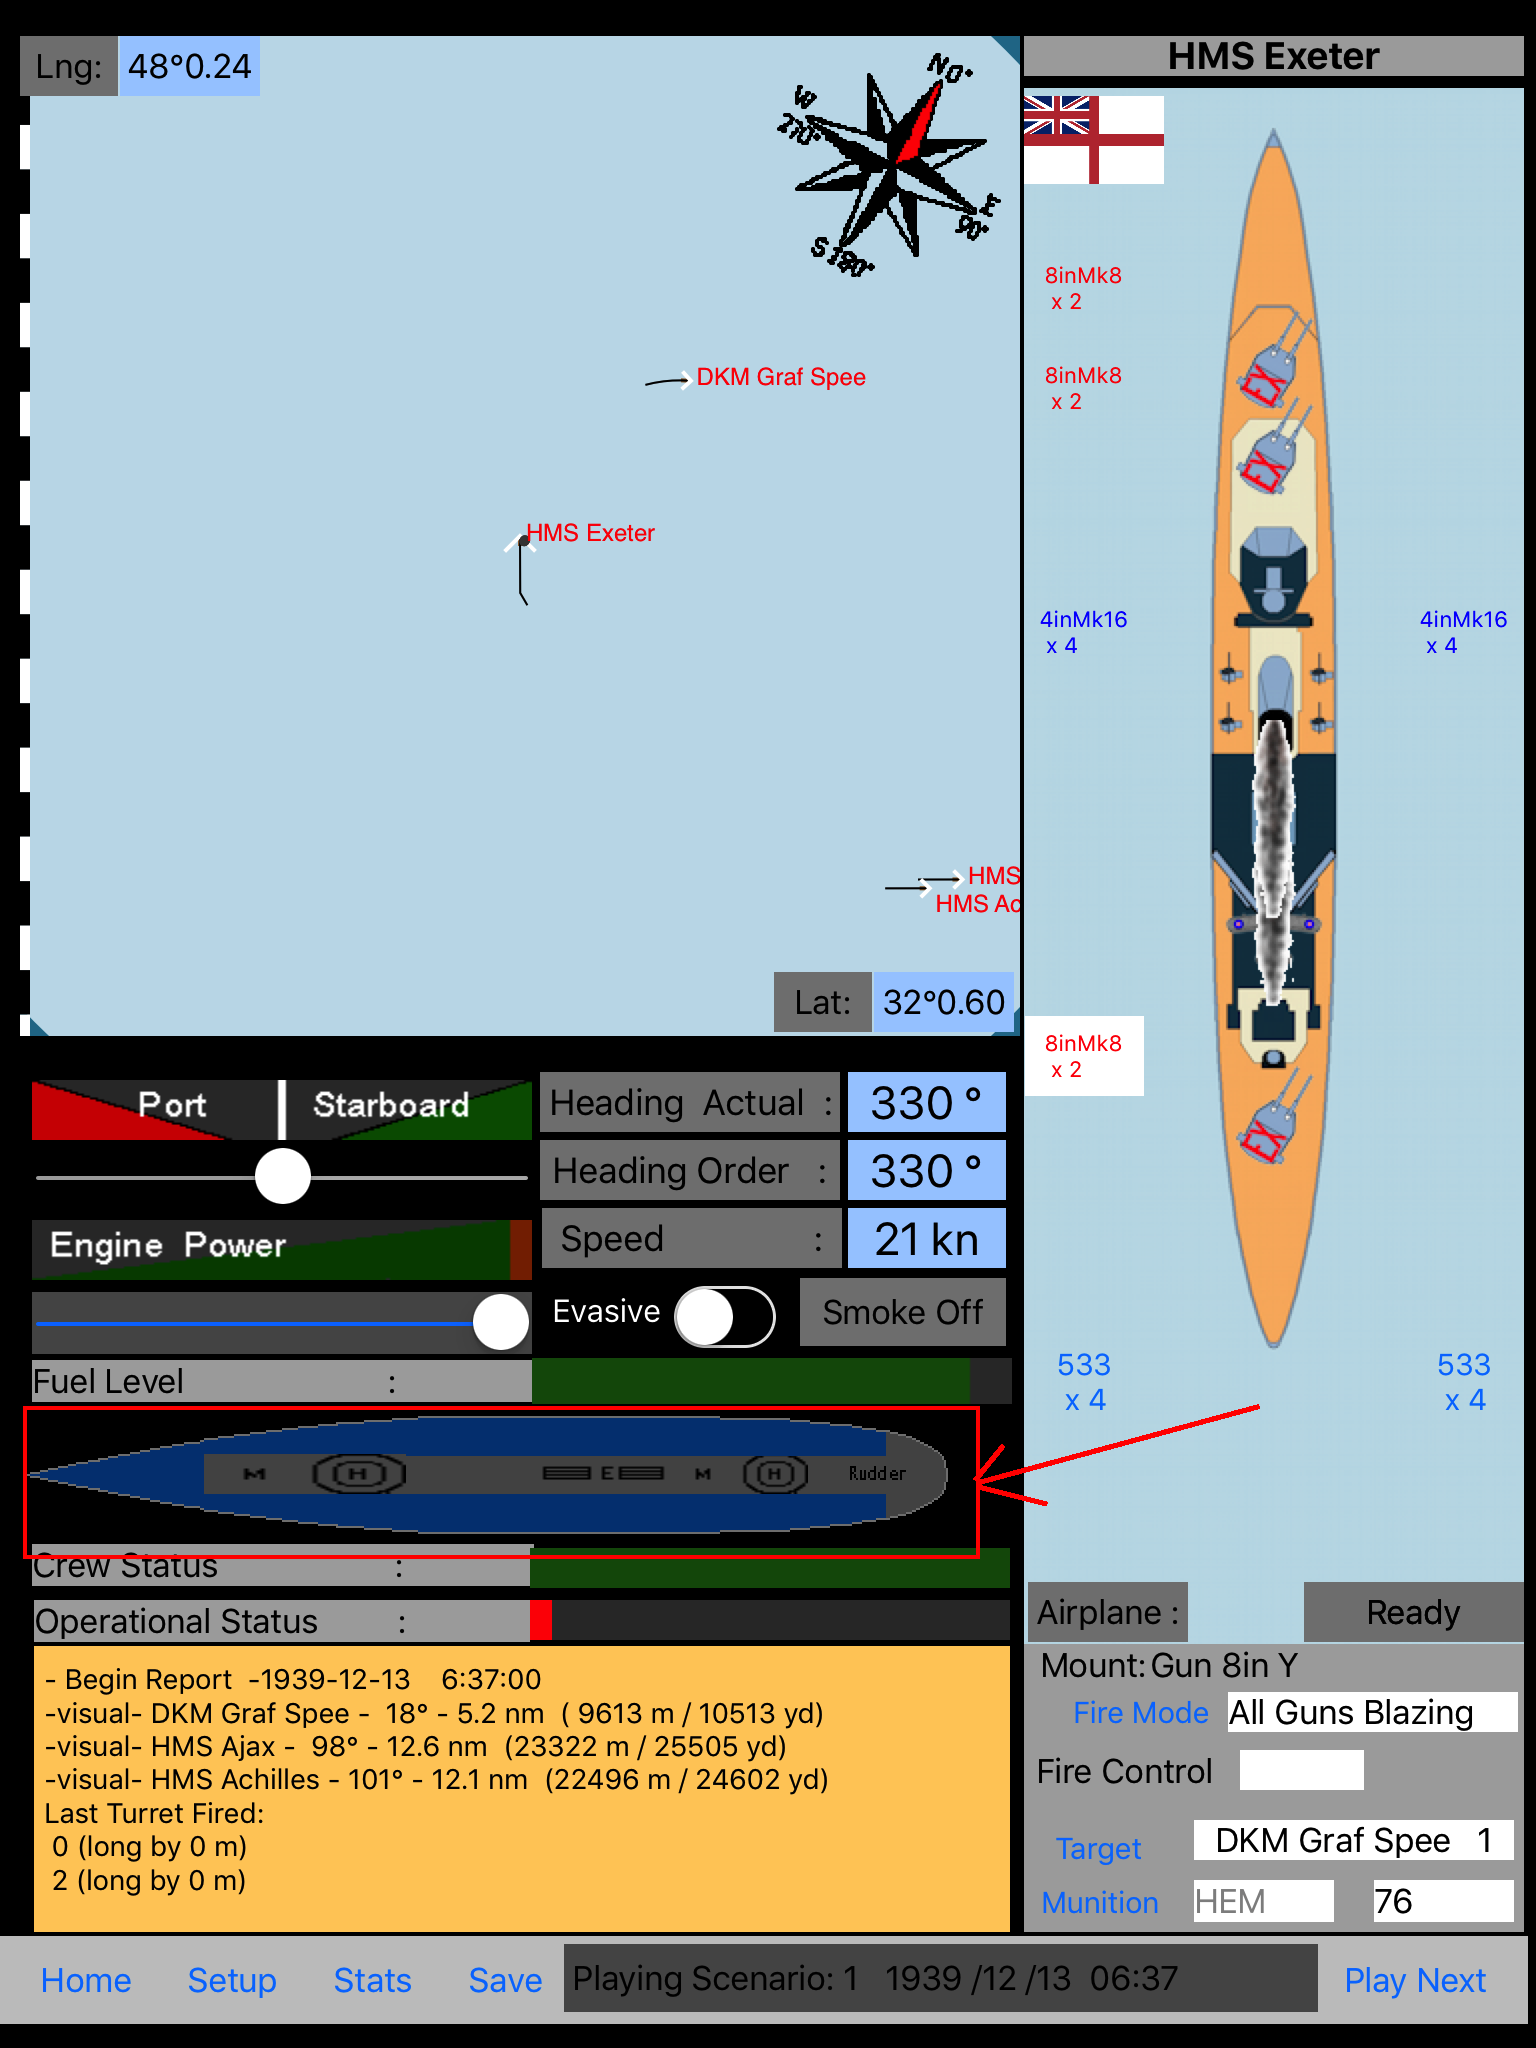
The scouting plane was also negating the effects of the smoke screens laid by the DKM Graf Spee. The changes in course were reported real time and the fire ranging were not interrupted.

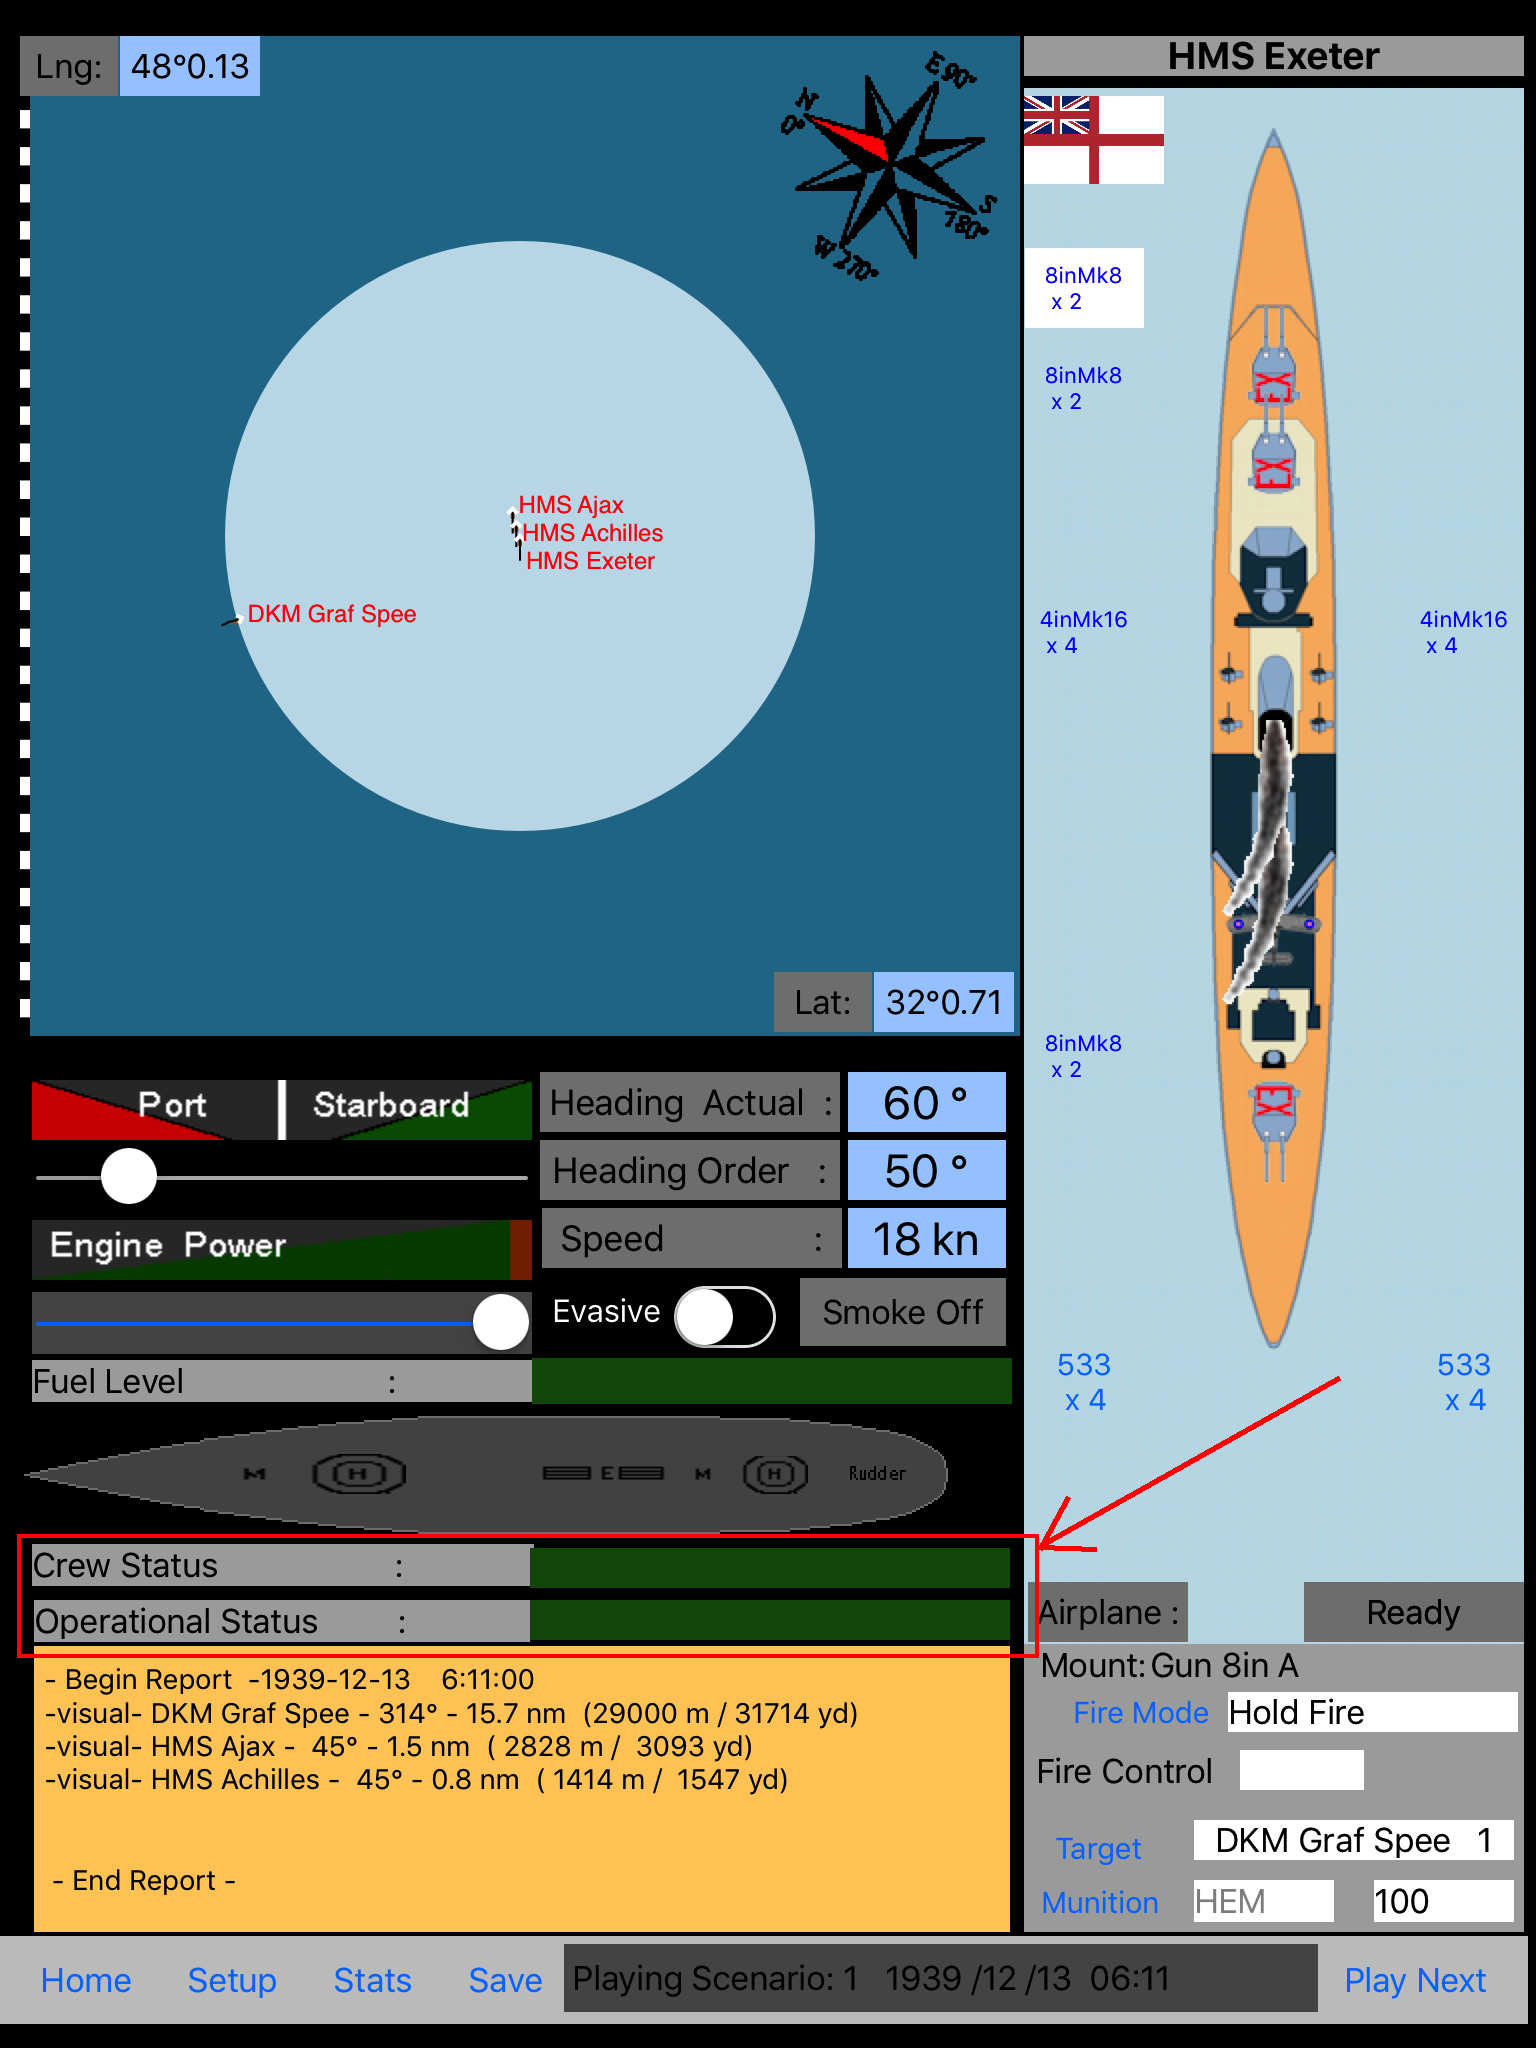
The last mission for the Seafox was to inquire on the HMS Exeter status, as she was out of communication and inform the squadron commander Harwood that she survived the fight despite the hard hits. The successful recovery of the airplane made at 9:12am did not disrupt the pursuit of the DKM Graf Spee.

[1] Eric J. Grove (2000) The Price of Disobedience

Sutton Publishing ISBN 0750909277 / 9780750909273

[2] Dudley Pope (1956) The Battle of River Plate

McBooks Press ISBN 9781590130964


Observation Plane Instruction (version 1.5.2)

In the pre-radar time observation planes were providing an essential feedback to the Fire Control Officer. This was making the firing much more accurate over time.

DKM Graf Spee 1.5.2 Observation plane 1

The first step is to launch the airplane, click the “Ready” button, the preparation of the catapulting is taking several minutes.

It will take also a few minutes once the airplane is in the air to establish the connection with the firing unit.

DKM Graf Spee 1.5.2 Observation plane 3

When the airplane is actively spotting you will have a special icon indicating an active radio connection.

DKM Graf Spee 1.5.2 Observation plane 4

During the launch phase, it is important to avoid direction changes as it could damage the plane.

Boat and Crew Status (Version 1.5.2)

The Operational Status summarize the overall combat worthiness of the boat. It is a combination of the power plant effectiveness, the accumulated damages to the structures (including the gunnery). Successive damages, by gun hit, torpedoes or bomb, will diminish the Operational Status down. The status bar will go from green to orange and ultimately red. Be careful to manage your units to keep them afloat, when the Operational Status is down to 0 your boat is a worthless sinking wreck!

The Crew Status is a combination of the accumulated stress and fatigue. The Moral, Training and Experience of the crew will influence the wearing out of the Crew Status through the engagement. Hits and near misses will be the main contributors to the degradation of the Crew Status. A lower Crew Status will affect the overall efficiency of the crew (Gunnery, Repair Operation and launch / retrieve of observation planes).

The boat flooding is represented on a schematic overview. Penetrating impacts on the belt or underwater will flood the hull, this flooding is limited due to the division in watertight compartments.

Map, Speed, Heading and Steering (version 1.5.2)

The map in the upper left corner of the screen is centered on the unit.

It is zoomable and there is a scale on the left side. The boat previous course is the black line and the white mustache is seized according to the speed.


Each bar is 1 nm (nautic mile). There is a compass providing directions and north alignment. The longitude (Lng) and latitude (Lat) are provided in the degree / decimal format.

Heading

The Heading cursor is below the Port / Starboard boxes. As you are displacing the cursor you will see the Heading order updated. The Heading order will be the unit direction at the next turn. Heading actual is the current heading.


The second cursor allows you to control the power. The speed up or down will be delayed due to the inertia of the boat. Boat speed are in nautical knots (kn), one knot of speed is one nautical mile per hour. Based on the power setting the Fuel level will decrease over time.
Evasive steering is controlled by a switch. When on, the boat will have a zigzag course. This was done to throw off the enemy gunnery and was quite efficient above a certain speed (~15 kn).

Getting started IOS Version 1.5.2

What is it about ?

DKM Graf Spee is a simulation of Naval Warfare. It will allow you to recreate the actual battle of the Rio de Plata and play also “what-if” scenario.

Historical Background

Bibliography

The game is turn based. Each turn duration is one minute and the turn start by orders for the Axis side and then orders for the Allied side.

How do I start to play?

From the “Home” screen,  choose one the scenario from the scrolling menu and read the short synopsis in the yellow tab. To load the scenario tap “Select”, At the prompt screen you will choose Continue (it will reset any game in progress)

We recommend the Scenario 1 (Historical Rio De Plata engagement), this way you can apply Commodore Harwood strategy.

The “Play Next” button will move screen to review the KriegsMarine main screen, another “Play Next” will provide the Allied (Royal Navy in this scenario) Main Screen.

The main screen contain weather information in a scrollable window (last 5 minutes of info).

The “Play Next” screen will start your units review and orders

For detailed information see  the following links:

Map, Speed, Heading and Steering

Boat and Crew Status

Gunnery Instructions

Torpedo Instructions

Observation Plane Instructions

The “Play Next” button will allow the review and orders to the 3 different units under your command in the scenario 1 (HMS Ajax, HMS Achilles and HMS Exeter).

After HMS Exeter all orders will be executed, including eventually gunnery resolution and torpedoes courses. The clock will tick one minute and the next turn will start.

Winning and Scoring

The goal of the allied Cruisers Squadron was to cause enough damage to the DKM Graf Spee to cripple her. Each boat has a point value which correspond to 100% of the operational value. The damage level required to cripple the DKM Graf Spee is 50% of the operational status. Your score (winning points) is the ratio of damages to the Graf Spee and total damages on your units.

For all information, please email info@softwim.com

Privacy Policy

Information Collection, Use, and Sharing 
We are the sole owners of the information collected on this site. We only have access to/collect information that you voluntarily give us via email or other direct contact from you. We will not sell or rent this information to anyone.

inks 
This website contains links to other sites. Please be aware that we are not responsible for the content or privacy practices of such other sites. We encourage our users to be aware when they leave our site and to read the privacy statements of any other site that collects personally identifiable information.

f you feel that we are not abiding by this privacy policy, you should contact us immediately via email info@softwim.com

Scenario #12 Faeroe Gap:The Last Ambush – 22, Dec 1939


In this fictional scenario, the Graf Spee has been able to successfully evade the allied pursuit after the battle of Mar de Plate.

The British Admiralty only has 2 Tribal class Destroyers and the HMS Warspite available to intercept the Graf Spee on his way back to Germany. The Graf Spee has been sighted xx North and yy West on a 60 course running 15 knots.

You need to plot your route to intercept the Graf Spee before night fall.


Scenario #11 Surprise encounter in the Faeroe Gap – 22, Dec 1939

In this fictional scenario, the Graf Spee has been able to successfully evade the allied pursuit after the battle of Mar de Plate.

The British Admiralty only has 2 Tribal class Destroyers and the HMS Warspite available to intercept the Graf Spee on his way back to Germany. The Graf Spee has been sighted xx North and yy West on a 60 course running 15 knots.

You need to plot your route to intercept the Graf Spee before night fall.

Torpedo Instructions (version 1.4.4)

The launch direction of the torpedo is set by the -/+ adjustment. You need to carefully select your firing angle as the units involved in the different scenarios were not able to re-load at sea.

The spread is needed when you launch a Torpedo salvo, it will increment the direction of the torpedo one by one.

Example:

You set the target at 260 and the spread is 3 degrees.

The torpedoes will progress every turn at their speed and along courses. When they run out of energy, they simply sink. You can track the torpedoes on the map screen.

Gunnery Instructions (version 1.4.4)

The gunnery interface has been enhanced in the version 1.4.4. You will select a gun mount on the unit view. When a gun mount is effectively selected his background will be white.

The name and information of the selected gun mount will appear in the gun mount view (bottom right corner of the screen). Fire Mode button allows to select the order for the gun mount:

Hold Fire No fire

Fire Once Fire one time per turn (minute) or at the rate of fire if it is less than one shot per minute

All Gun Blazing Fire at maximum rate

Straddle This fire mode allows to converge faster on the target, you can see the dispersion of a straddle fire in the red box inside the map view.

Gunnery_04

You can select the ammunition type. APM stands for Armor Penetration munition and HEM stands for High Explosive Munition. APM are efficient against heavy armored plated hulls and HEM are efficient against superstructures.

Gunnery_03